
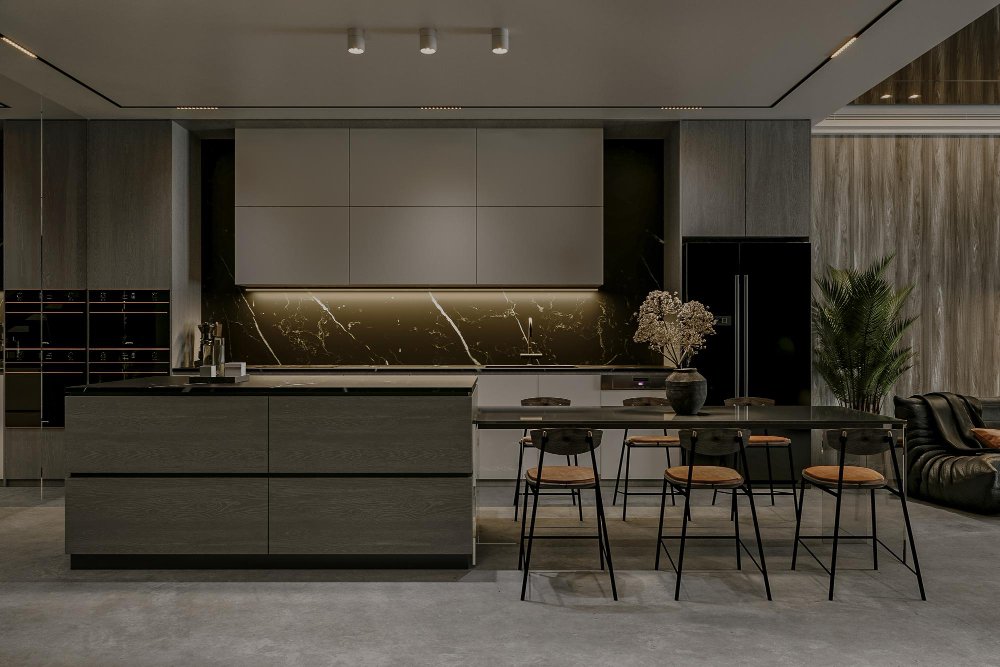
A thoughtfully designed kitchen backsplash does much more than protect walls from water and cooking splashes. It helps define the kitchen’s style, simplifies cleaning, and creates a visual connection between countertops, cabinetry, and appliances. However, choosing the right backsplash involves far more than selecting a tile pattern. Material performance, maintenance, grout selection, lighting, and installation quality all affect the final result.
This step-by-step guide explains how homeowners can confidently plan a backsplash that remains beautiful and practical for years.
Many backsplash projects begin with a favorite tile sample, but successful designs begin with understanding how the kitchen is used. A family that cooks several meals every day has different priorities than a homeowner who entertains occasionally or prefers a minimalist aesthetic.
Before visiting a showroom, take time to evaluate:
- How much cooking takes place each week.
- How often grease or food splashes occur.
- How much natural light reaches the kitchen.
- How much maintenance you’re willing to perform.
- Whether the backsplash should become a focal point or blend into the overall design.
Answering these questions makes selecting materials much easier.
Step 1: Choose the Right Material for Everyday Use
Different backsplash materials offer different advantages. Rather than choosing solely by appearance, compare how each performs over time.
| Material | Benefits | Things to Consider |
|---|---|---|
| Ceramic Tile | Affordable, easy to clean, many styles | Grout requires maintenance |
| Porcelain Tile | Durable, moisture resistant | Professional cutting often recommended |
| Natural Stone | Unique appearance | May require sealing |
| Glass Tile | Reflects light beautifully | Installation requires precision |
| Slab Backsplash | Minimal grout lines, modern appearance | Higher material cost |
Tip: Ask to see full-size samples whenever possible. Small display pieces rarely show how a backsplash will look across an entire wall.
Step 2: Plan the Layout Before Ordering Materials
Good planning reduces waste and creates a cleaner finished appearance.
Think about:
- Where tile cuts will occur.
- How the backsplash aligns with cabinets.
- Electrical outlet locations.
- Window transitions.
- Whether the backsplash will extend to the ceiling.
Careful planning before installation often produces a much more balanced and professional-looking design.
Quick Tip
Lay out several rows of tile on a flat surface before installation. This allows you to evaluate color variation, pattern flow, and spacing before adhesive is applied.
Step 3: Select Grout Carefully
Grout influences both maintenance and appearance.
Light-colored grout creates a clean, bright look but may show stains more readily. Darker grout can hide everyday discoloration but creates stronger visual contrast between tiles.
Also consider grout width. Narrow joints create a more contemporary appearance, while wider joints can emphasize traditional tile patterns.
⚠ Warning
Never choose grout color using a printed brochure alone. View physical samples next to your countertop, cabinetry, and backsplash tile under your kitchen lighting before making a final decision.
Step 4: Don’t Overlook Lighting
Lighting changes the way every backsplash looks. The same tile can appear warmer, cooler, brighter, or more textured depending on the type and direction of the light.
Before finalizing your selection, consider:
- Natural daylight throughout the day.
- Under-cabinet task lighting.
- Pendant lighting over islands.
- Reflections from glossy finishes.
- How shadows affect textured tile.
Whenever possible, view tile samples under lighting conditions similar to those in your own kitchen.
Step 5: Focus on Professional Installation
Even premium materials can look disappointing if installation is rushed. Straight layout lines, consistent grout joints, carefully aligned outlet cuts, and smooth transitions around windows and cabinets all contribute to the finished appearance.
A professional installer should also verify:
- The wall surface is flat and properly prepared.
- Tile layout is balanced before adhesive is applied.
- Movement joints are installed where appropriate.
- Grout cures according to manufacturer recommendations.
- Edges are finished cleanly with trim or polished tile.
Quality installation often makes a greater visual difference than upgrading to a more expensive tile.
Step 6: Keep Long-Term Maintenance in Mind
A backsplash should continue looking attractive with reasonable care—not require constant attention.
To keep it in excellent condition:
- Clean cooking splashes before they dry.
- Use non-abrasive cleaning products.
- Inspect grout periodically for damage.
- Reseal natural stone if recommended by the manufacturer.
- Repair cracked grout promptly to prevent moisture intrusion.
Regular maintenance protects both the appearance and the lifespan of the installation.
“The best backsplash is the one you rarely think about because it quietly performs its job every single day.”
Questions to Ask Before Installation
Before approving the project, discuss these important details with your contractor:
- How will the tile layout be centered?
- Will outlet covers align neatly with the finished surface?
- What grout is recommended for my kitchen?
- Are trim pieces included in the estimate?
- How should the backsplash be maintained after installation?
- What workmanship warranty is provided?
These questions help ensure there are no surprises once installation begins.
Creating a Backsplash That Lasts
Professional kitchen wall tile installation is about more than adding visual interest. A well-designed backsplash protects your walls, simplifies cleaning, and brings together the kitchen’s cabinetry, countertops, and lighting into one cohesive design.
By choosing materials based on performance, planning the layout carefully, selecting grout thoughtfully, and investing in quality installation, homeowners can create a backsplash that continues looking beautiful and functioning reliably for many years.




Leave a Reply